In this next section of the course we start looking at using at how to use individual tools in Photoshop to edit and alter photos, in this project its the Clone Stamp. The Clone Stamp is one of my favorite tools and something that i learned to use very early on because of how useful it can be in removing imperfections within your shots that you might have noticed when taking it. For example to begin with i used it most to remove small specks of dust or dirt that had got onto my lens while the cap was off and i hadn't noticed until it came to reviewing my work in photoshop. This is a relatively easy fix with the clone stamp because it only means you have to alter a very small area by first selecting the stamp tool then highlighting the area you wish to copy from by pressing the Alt button and then right clicking on the mouse, then by using a soft edge brush you can paint over in affect the troublesome blemish and have the perfect shot once more. Of course you can use the clone stamp on a much grander scale and in this project that what I'm asked to look at.
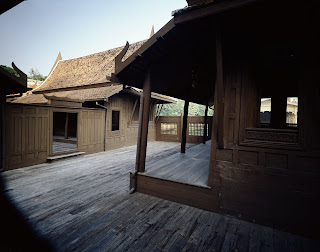
Original Thaihouse.
Above is the image I'm given to work with on the idea of with a clone stamp you can extend the image into the areas in the top left and bottom left corners where no detail is present. Below are the results of my work, first i fixed the sky which was a pretty straight forward problem as there are no clouds to bother about and the sky is pretty much one uniformed colour which meant i could pick any spot to clone from. The floor on the other hand was much more of a challenge because you have to be aware of the direction each board is heading in and the lines that are produced by each section. This meant that more time was needed to make sure that each board was cloned individual and that there was good continuity throughout the cloned area. I had attempted to clone large areas before but this was probably the most complicated area I'd ever tried to copy before so I'm very happy with how the final shot turned out and i feel the effort i put in really shows.
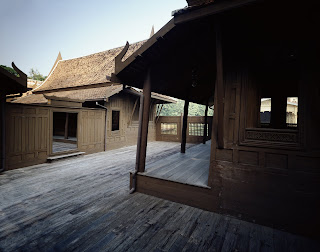
My Extended Thaihouse.
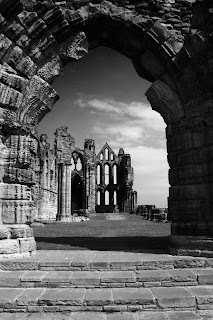
Original Whitby Abbey.
For the final part of the project its back to your own work and following the same process on a shot of your own, the photo i went for was a shot i took of Whitby Abbey in Yorkshire. First your asked to expanded the canvas size by 10% down one side of the image so i did this to the bottom edge because i new this had the most potential for expanding. To begin with i just copied the steps that i already had straight in to the extended area but i soon noticed that it was very obvious that I'd done this so i new i had to break up the pattern produced by the stone work so that it look different and more natural. By selecting individual steps and moving them around i was able to produce the illusion (because after all that's what it really is) that it wasn't just the same area copied but a real life continuation of the steps. Again i think the results below area really good and show that i have a good understanding of how to get the best out of the clone stamp tool.
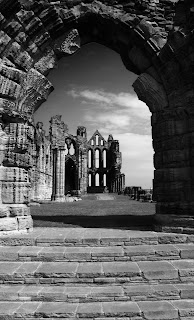
Extended Whitby Abbey.
 Original Thaihouse.
 My Extended Thaihouse.
 Original Whitby Abbey.
 Extended Whitby Abbey.
No comments:
Post a Comment